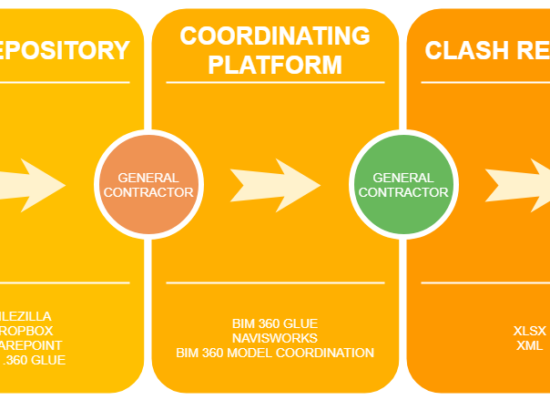
BIM coordination: What is it really? Is it a matter of drawing blocks or cylinders and calling it a day? Let’s break it down. BIM stands for Building Information Modeling. When someone mentions BIM Coordination they’re referring to a 3D model that will help subcontractors make an educated guess on how to adjust their corresponding trade. Prior to BIM, subcontractors had to coordinate in the field. By doing pre-coordination it helped save time and headaches in the field.
It would be nice if it was possible to crop certain parts of the building or change the transparency of a system in the field to be able to view things but technology isn’t there yet. In this article, we will break down each phase of Coordination. Starting from the creating stage, moving to export/uploading, coordination and clash reporting, and wrapping it up with RFIs.

When a BIM coordination initially begins, all trades agree upon certain standards. For example, minimal pipe sizes, file naming conventions, upload scheduling, meeting scheduling, and project timeline. When detailers start modeling their starting point begins with the contract drawings and submittals. Once the detailers have most of their trade modeled they would export models and upload into an authoring tool (depending on the platform they’re working on).
All trades upload their corresponding models with the file naming convention discussed during the kick-off meeting. Below is an example of what the General Contractor’s BIM Coordinator normally asks for when it comes to model naming. It will vary from GC to GC.
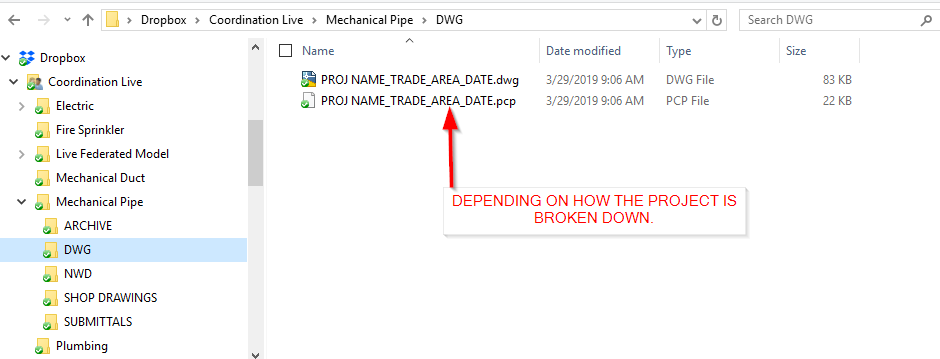
Another thing to look at from the screenshot is the folder structure. As soon as the coordination team uploads their BIM models into the file repository the GC’S BIM coordinator combines the files.
Once all the BIM data is implemented the coordinator saves the combined file as a federated model in Navisworks or BIM 360 Glue and start generating clash reports.
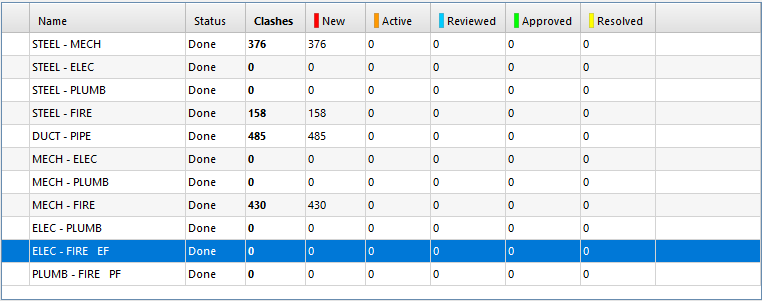
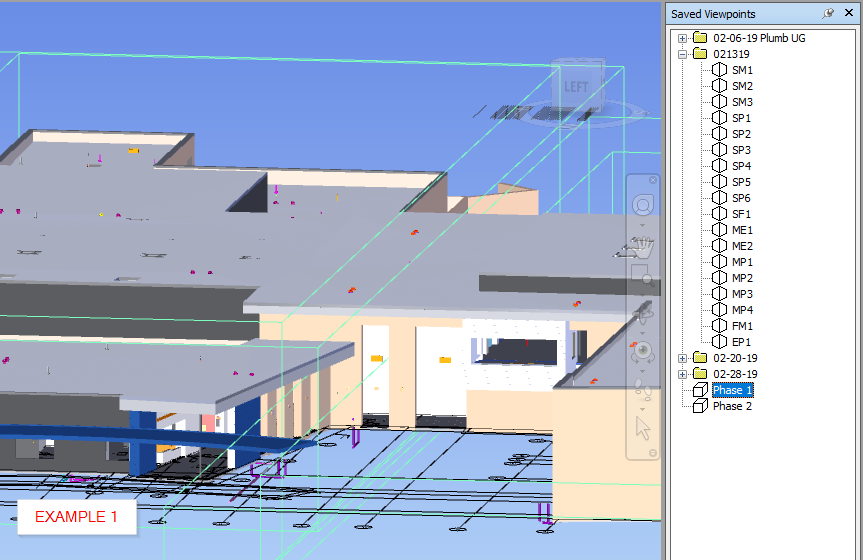
After running and reviewing the report the coordinator would then either save viewpoints from within Navisworks/BIM 360 Glue (Example 1).
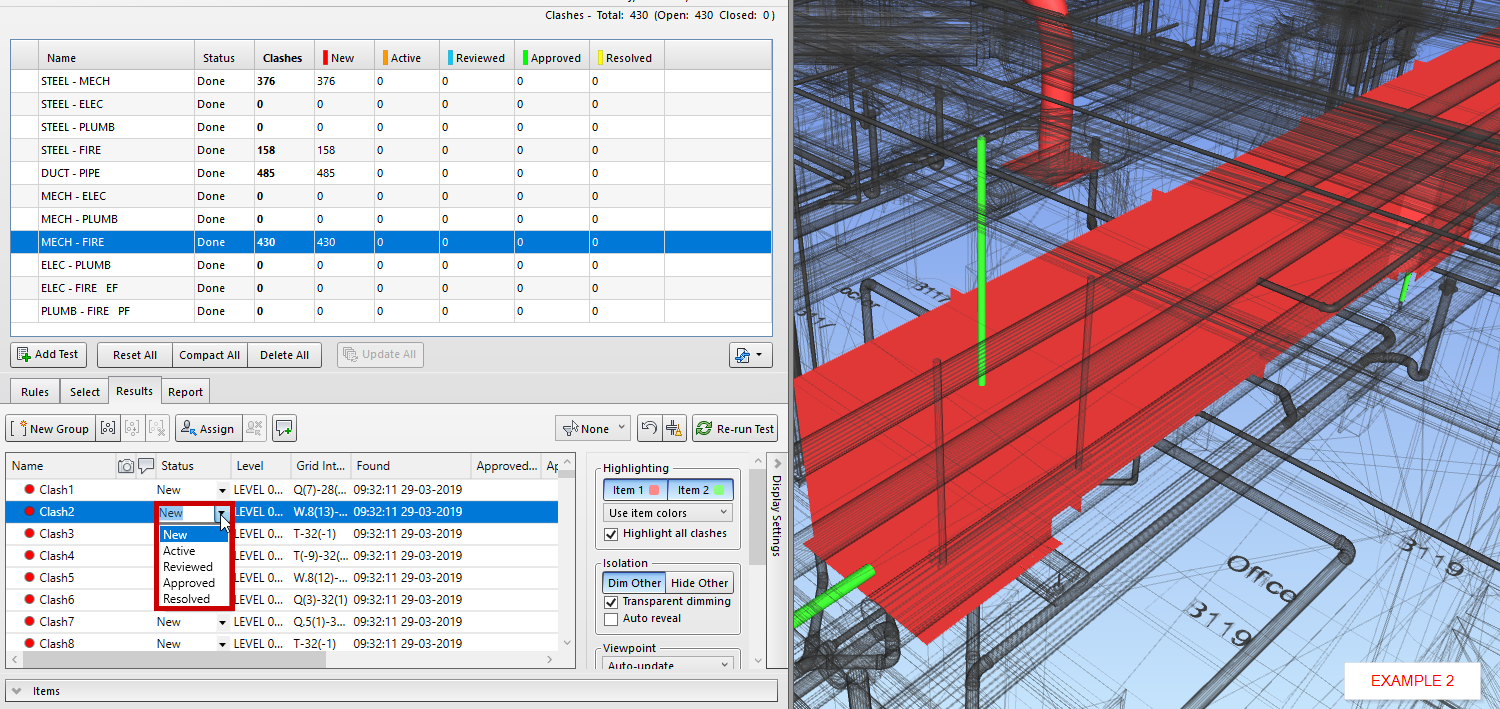
Or they will mark them on the report as “Resolved” “Reviewed” or “Approved” (Example 2).
After the coordinator creates the clashing set the coordination team meets to discuss a plan of action. The team reviews all the clashes and eventually encounter an area where they will require a course of action from the Architect or Engineers. For documentation purposes, the Subcontractor will submit an RFI (Request For Information). See image below.
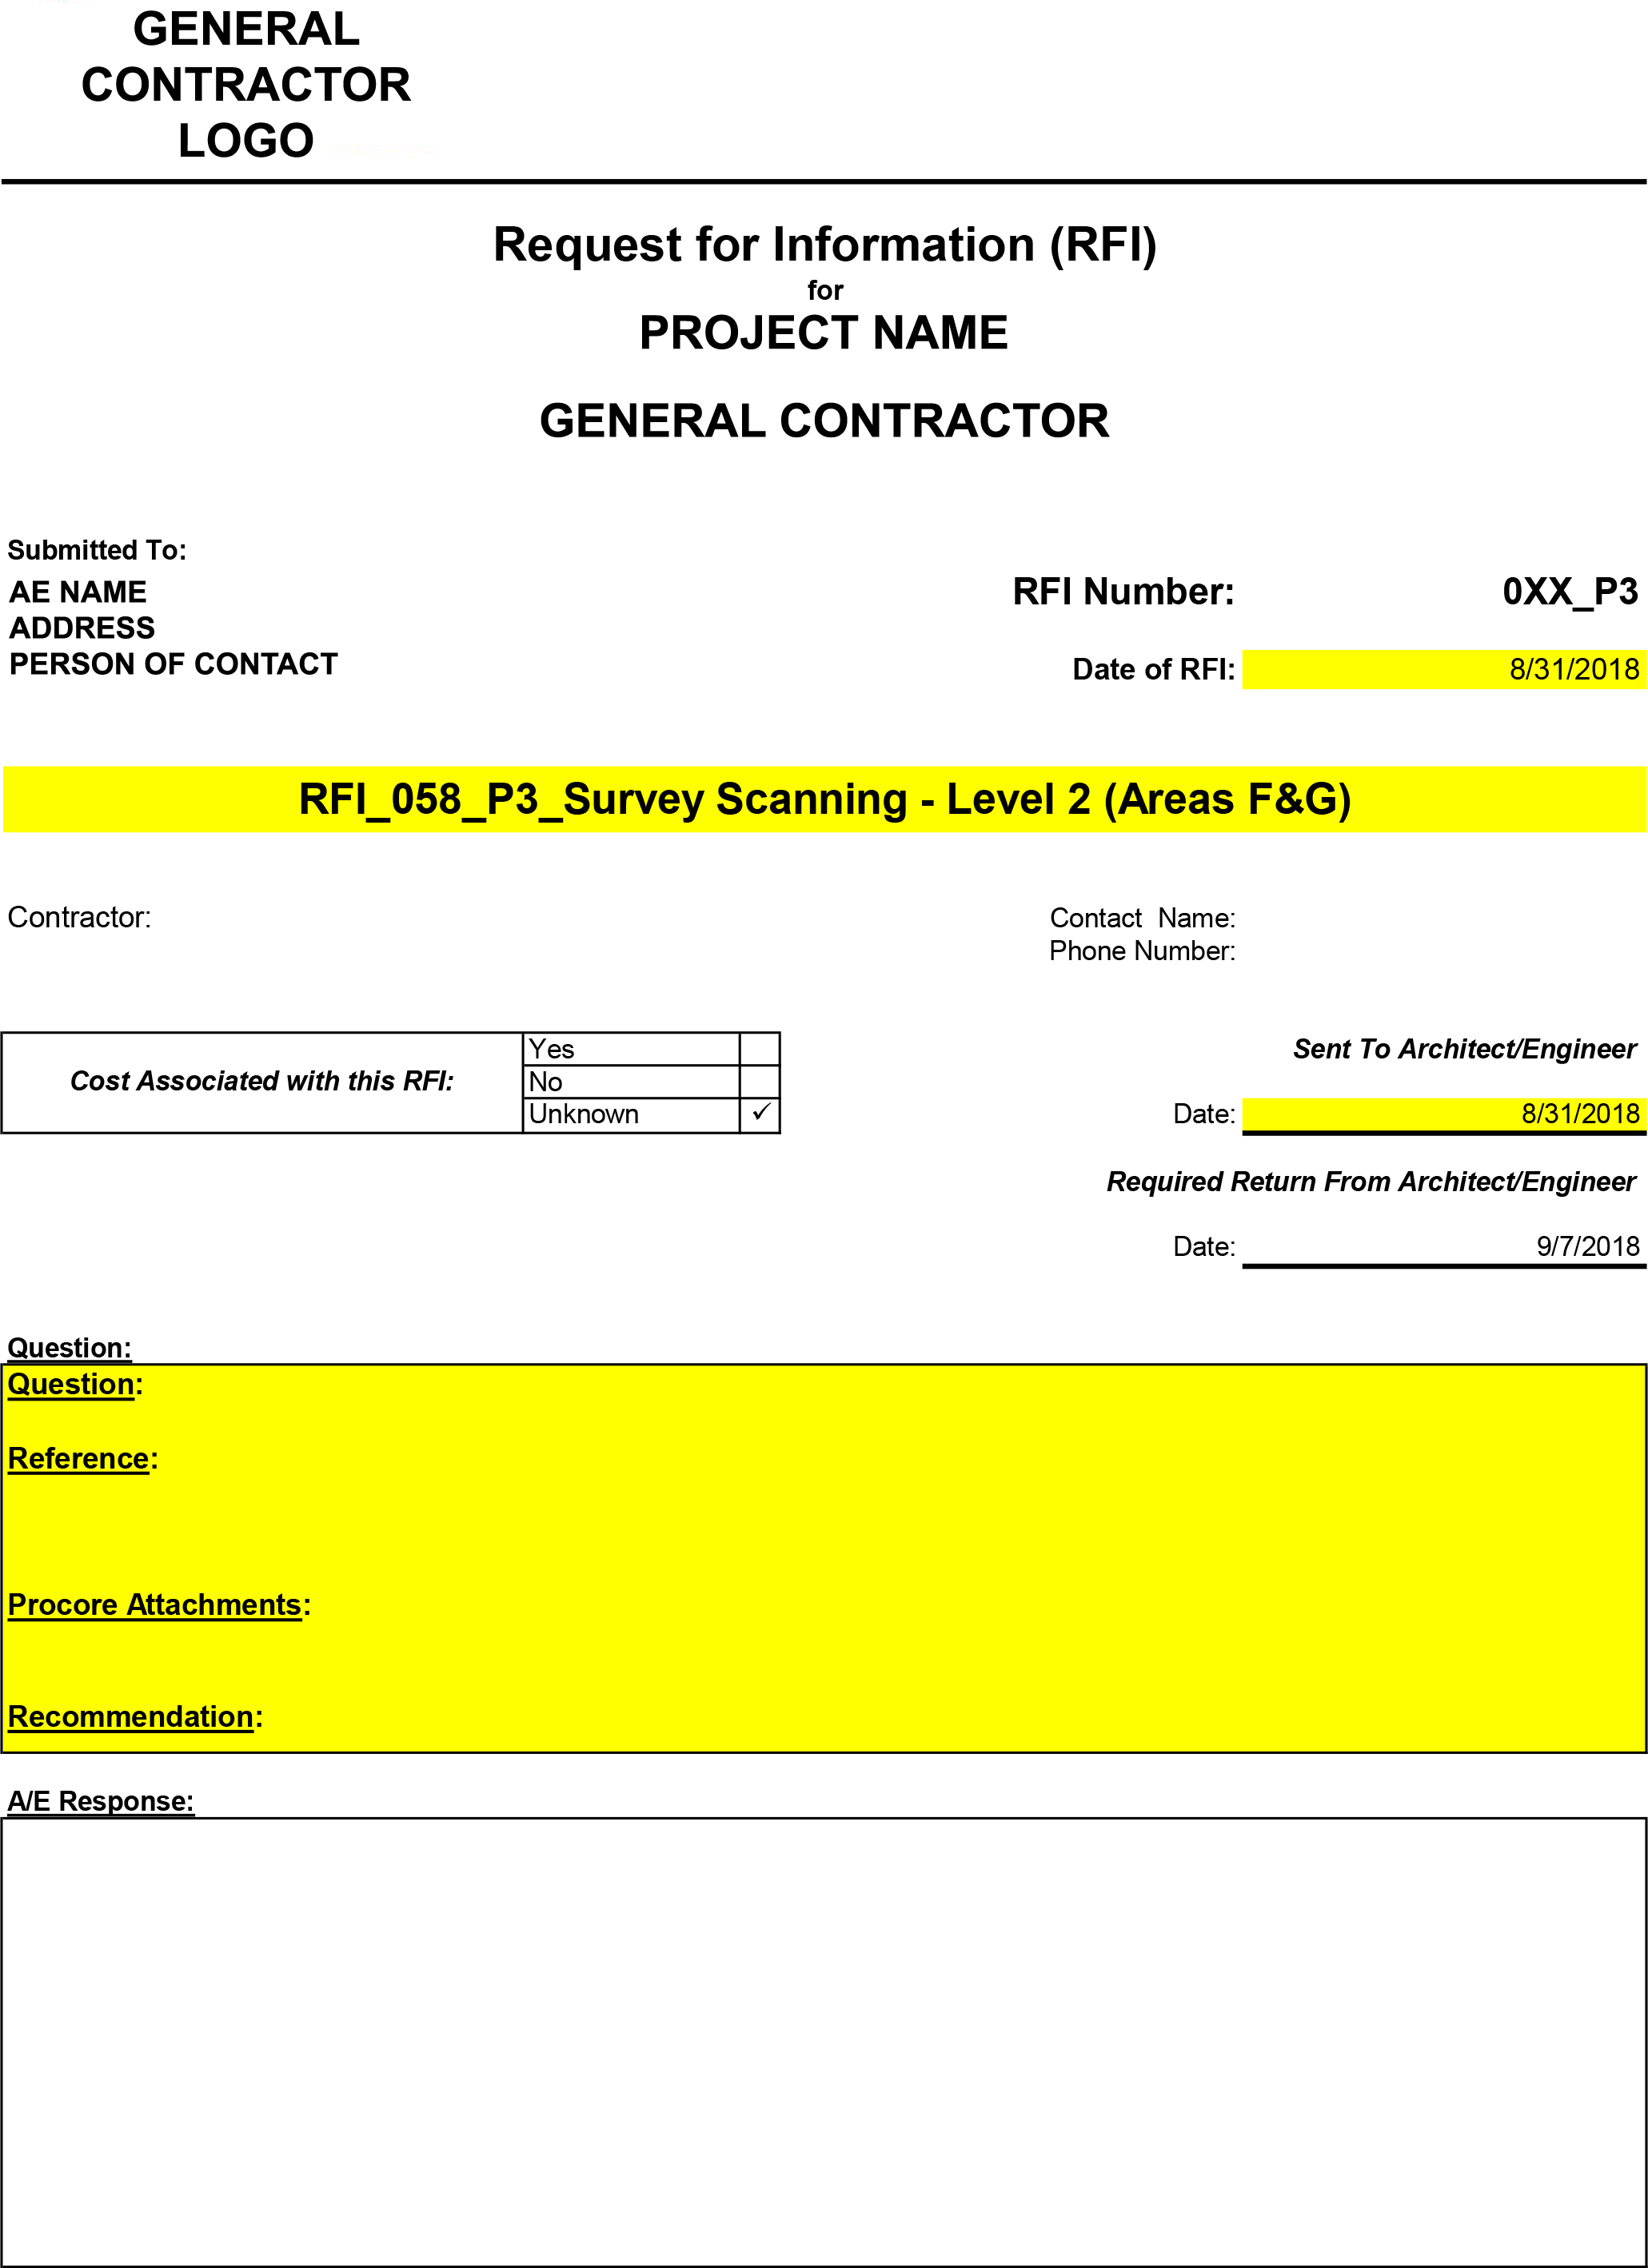
RFI’s are a crucial aspect of the whole coordination process because it may take the Architects and Engineers some time to come up with a solution or it could be a simple fix. The sooner the RFI is sent out the better, but also make sure to provide enough information (screenshots of a conflicting area, a room location, a very descriptive paragraph of the issue, and possibly some sections if needed). Once the RFI has been answered by the Architect or Engineer, the solution is sent out to the BIM coordination team to implement all changes and the cycle repeats until all clashes are resolved.
Let’s recap all the information we’ve gathered on BIM coordination and the process for it. First, a kick off meeting set standards and agreed upon, which will lead to the modeling process where detailers model their corresponding trades. The detailers will then upload their models into a file repository where the BIM coordinator download the models and assemble a federated model and generate a clash report. Once the BIM coordinator reviews the report the detailers meet to review clashes. If a clash cannot be resolved then an RFI must be sent out to the AE for review. Afterward, a solution will be sent back that the detailers implement. This cycle continues until the project is fully coordinated and handed off to the Owner.
